Business Central Onboarding-guide
Denna guide hjälper dig att ställa in Equity i Business Central.
Förutsättningar
Åtkomst till Business Central (som administratör).
Åtkomst till Azure-portalen med behörighet att skapa appregistreringar.
Information om din Business Central-miljö (environment name + ID).
Om företaget använder Continia Document Capture:
Integrationsanvändaren måste ha behörighetsuppsättningen CDC BASIC tilldelad i Business Central.
Starta onboarding från Business Central
Logga in på Business Central.
Hitta “Equity”-tillägget.
Klicka på Start onboarding.
Skapa App-registrering i Azure Entra
Gå till Azure Portal.
Välj Azure Active Directory → App registrations → + New registration
Fyll i:
Namn: “Equity”Supported account types: Single tenant
Redirect URI:
https://businesscentral.dynamics.com/OAuthLanding.htmKlicka Register.
Skapa klienthemlighet
Gå till Certificates & secrets.
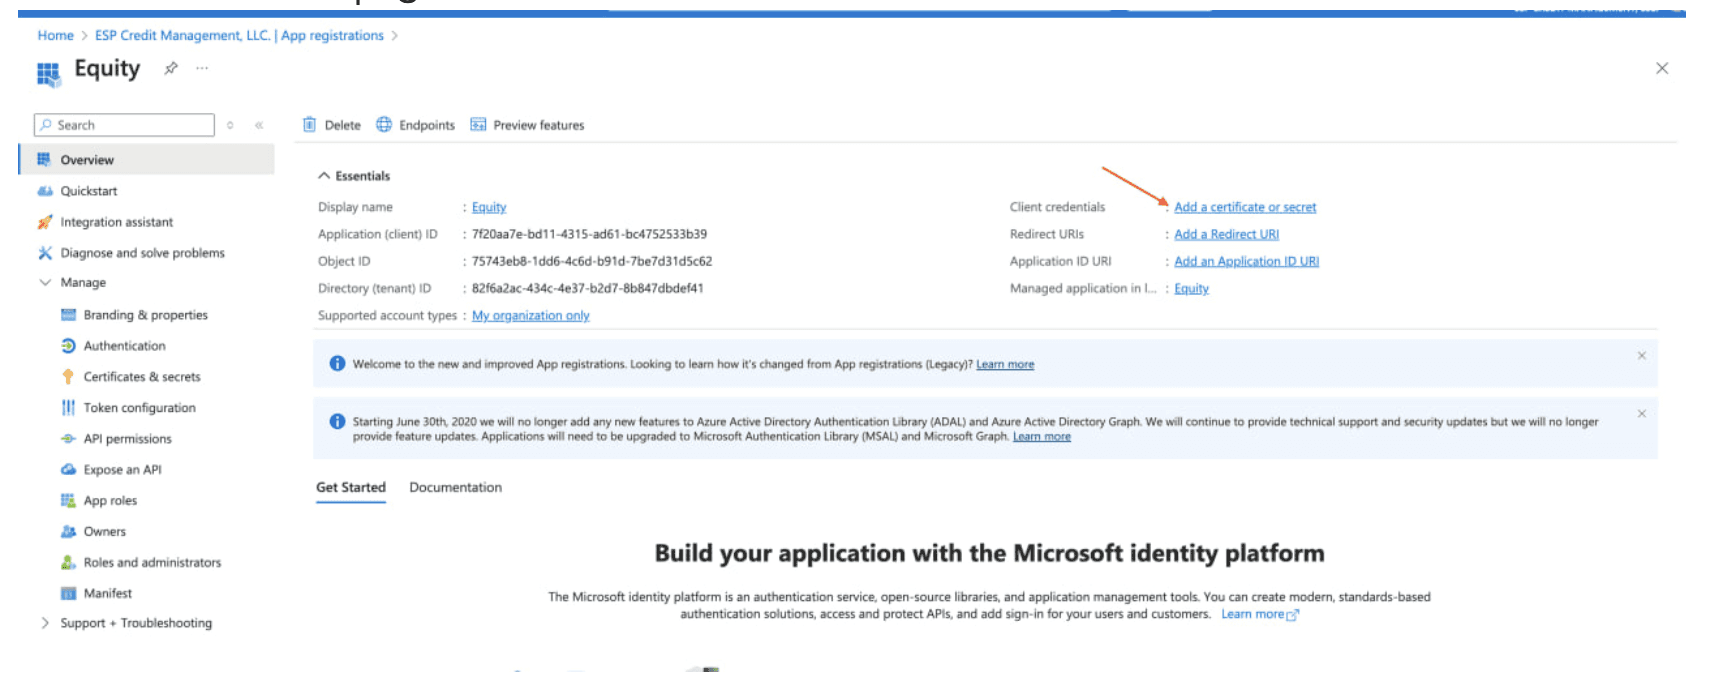
Klicka + New client secret.
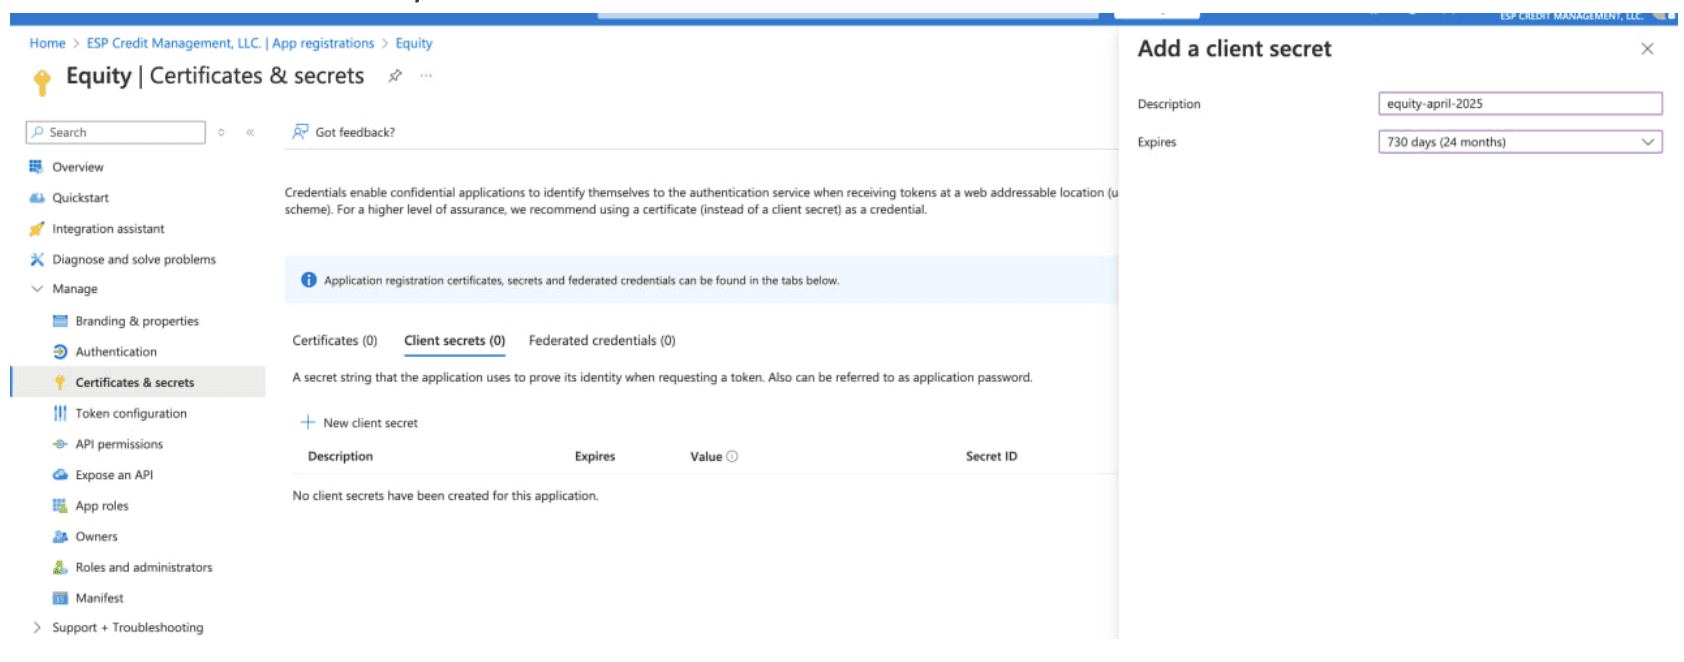
Ge ett namn, t.ex.
equityVälj utgångstid (24 månader eller längre).
Kopiera Value och spara det säkert (du får det bara visat en gång!).
Lägg till API-behörigheter
Gå till API permissions → + Add a permission.
Välj Dynamics 365 Business Central → Application permissions.
Kryssa för:
app_access
API.ReadWrite.All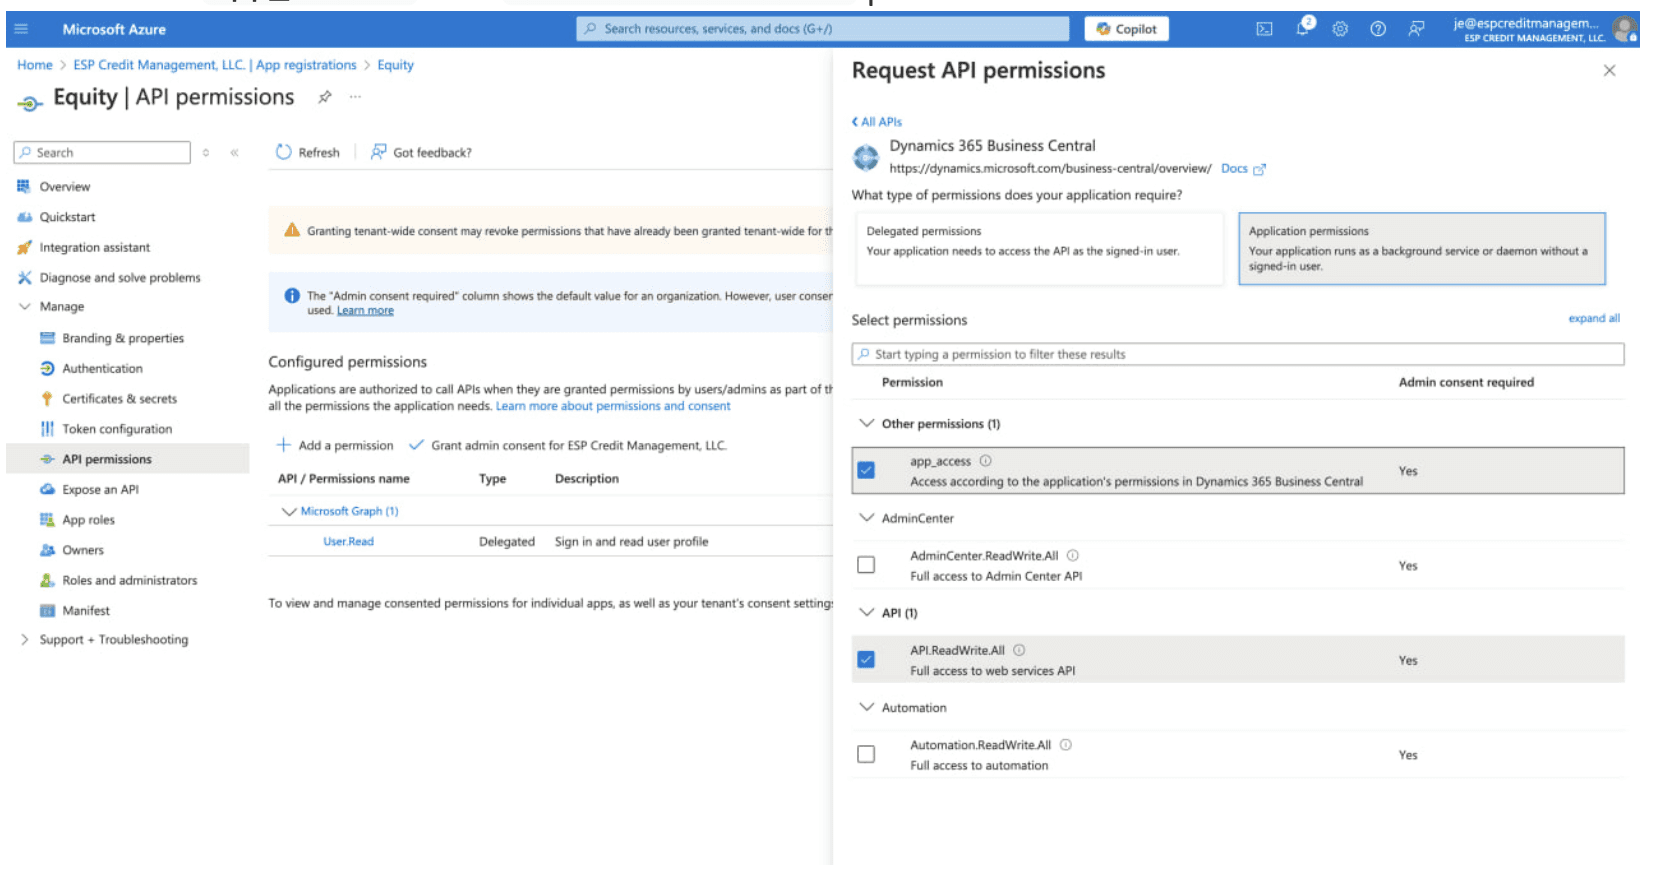
Klicka Add permissions.
Klicka Grant admin consent.
Registrering i Business Central
Appen måste nu registreras i Business Central med rätt behörigheter.
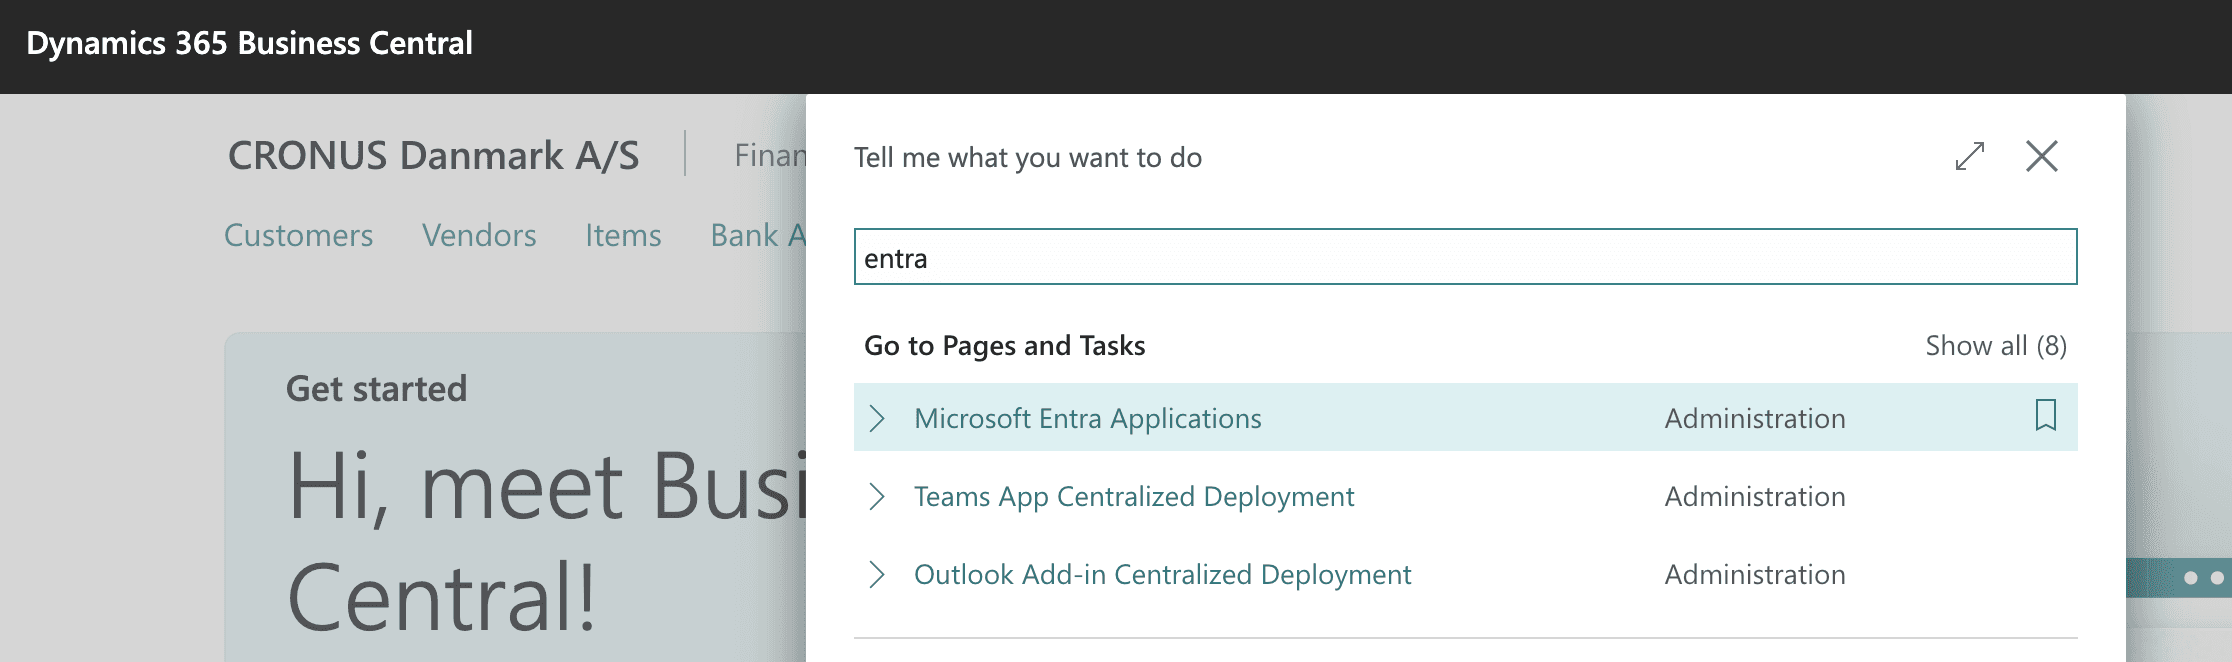
Logga in i Business Central och klicka på Sök (förstoringsglaset).
Sök efter Microsoft Entra-program.
Klicka på Ny för att lägga till ett nytt program.
Fyll i följande fält:
Klient-ID: Ange samma App-ID som registrerades i Entra.
Beskrivning: Equity
Extension App ID:
0a00ae2b-ba86-4e65-8769-1f9bc38dd25bExtension-namn: Equity
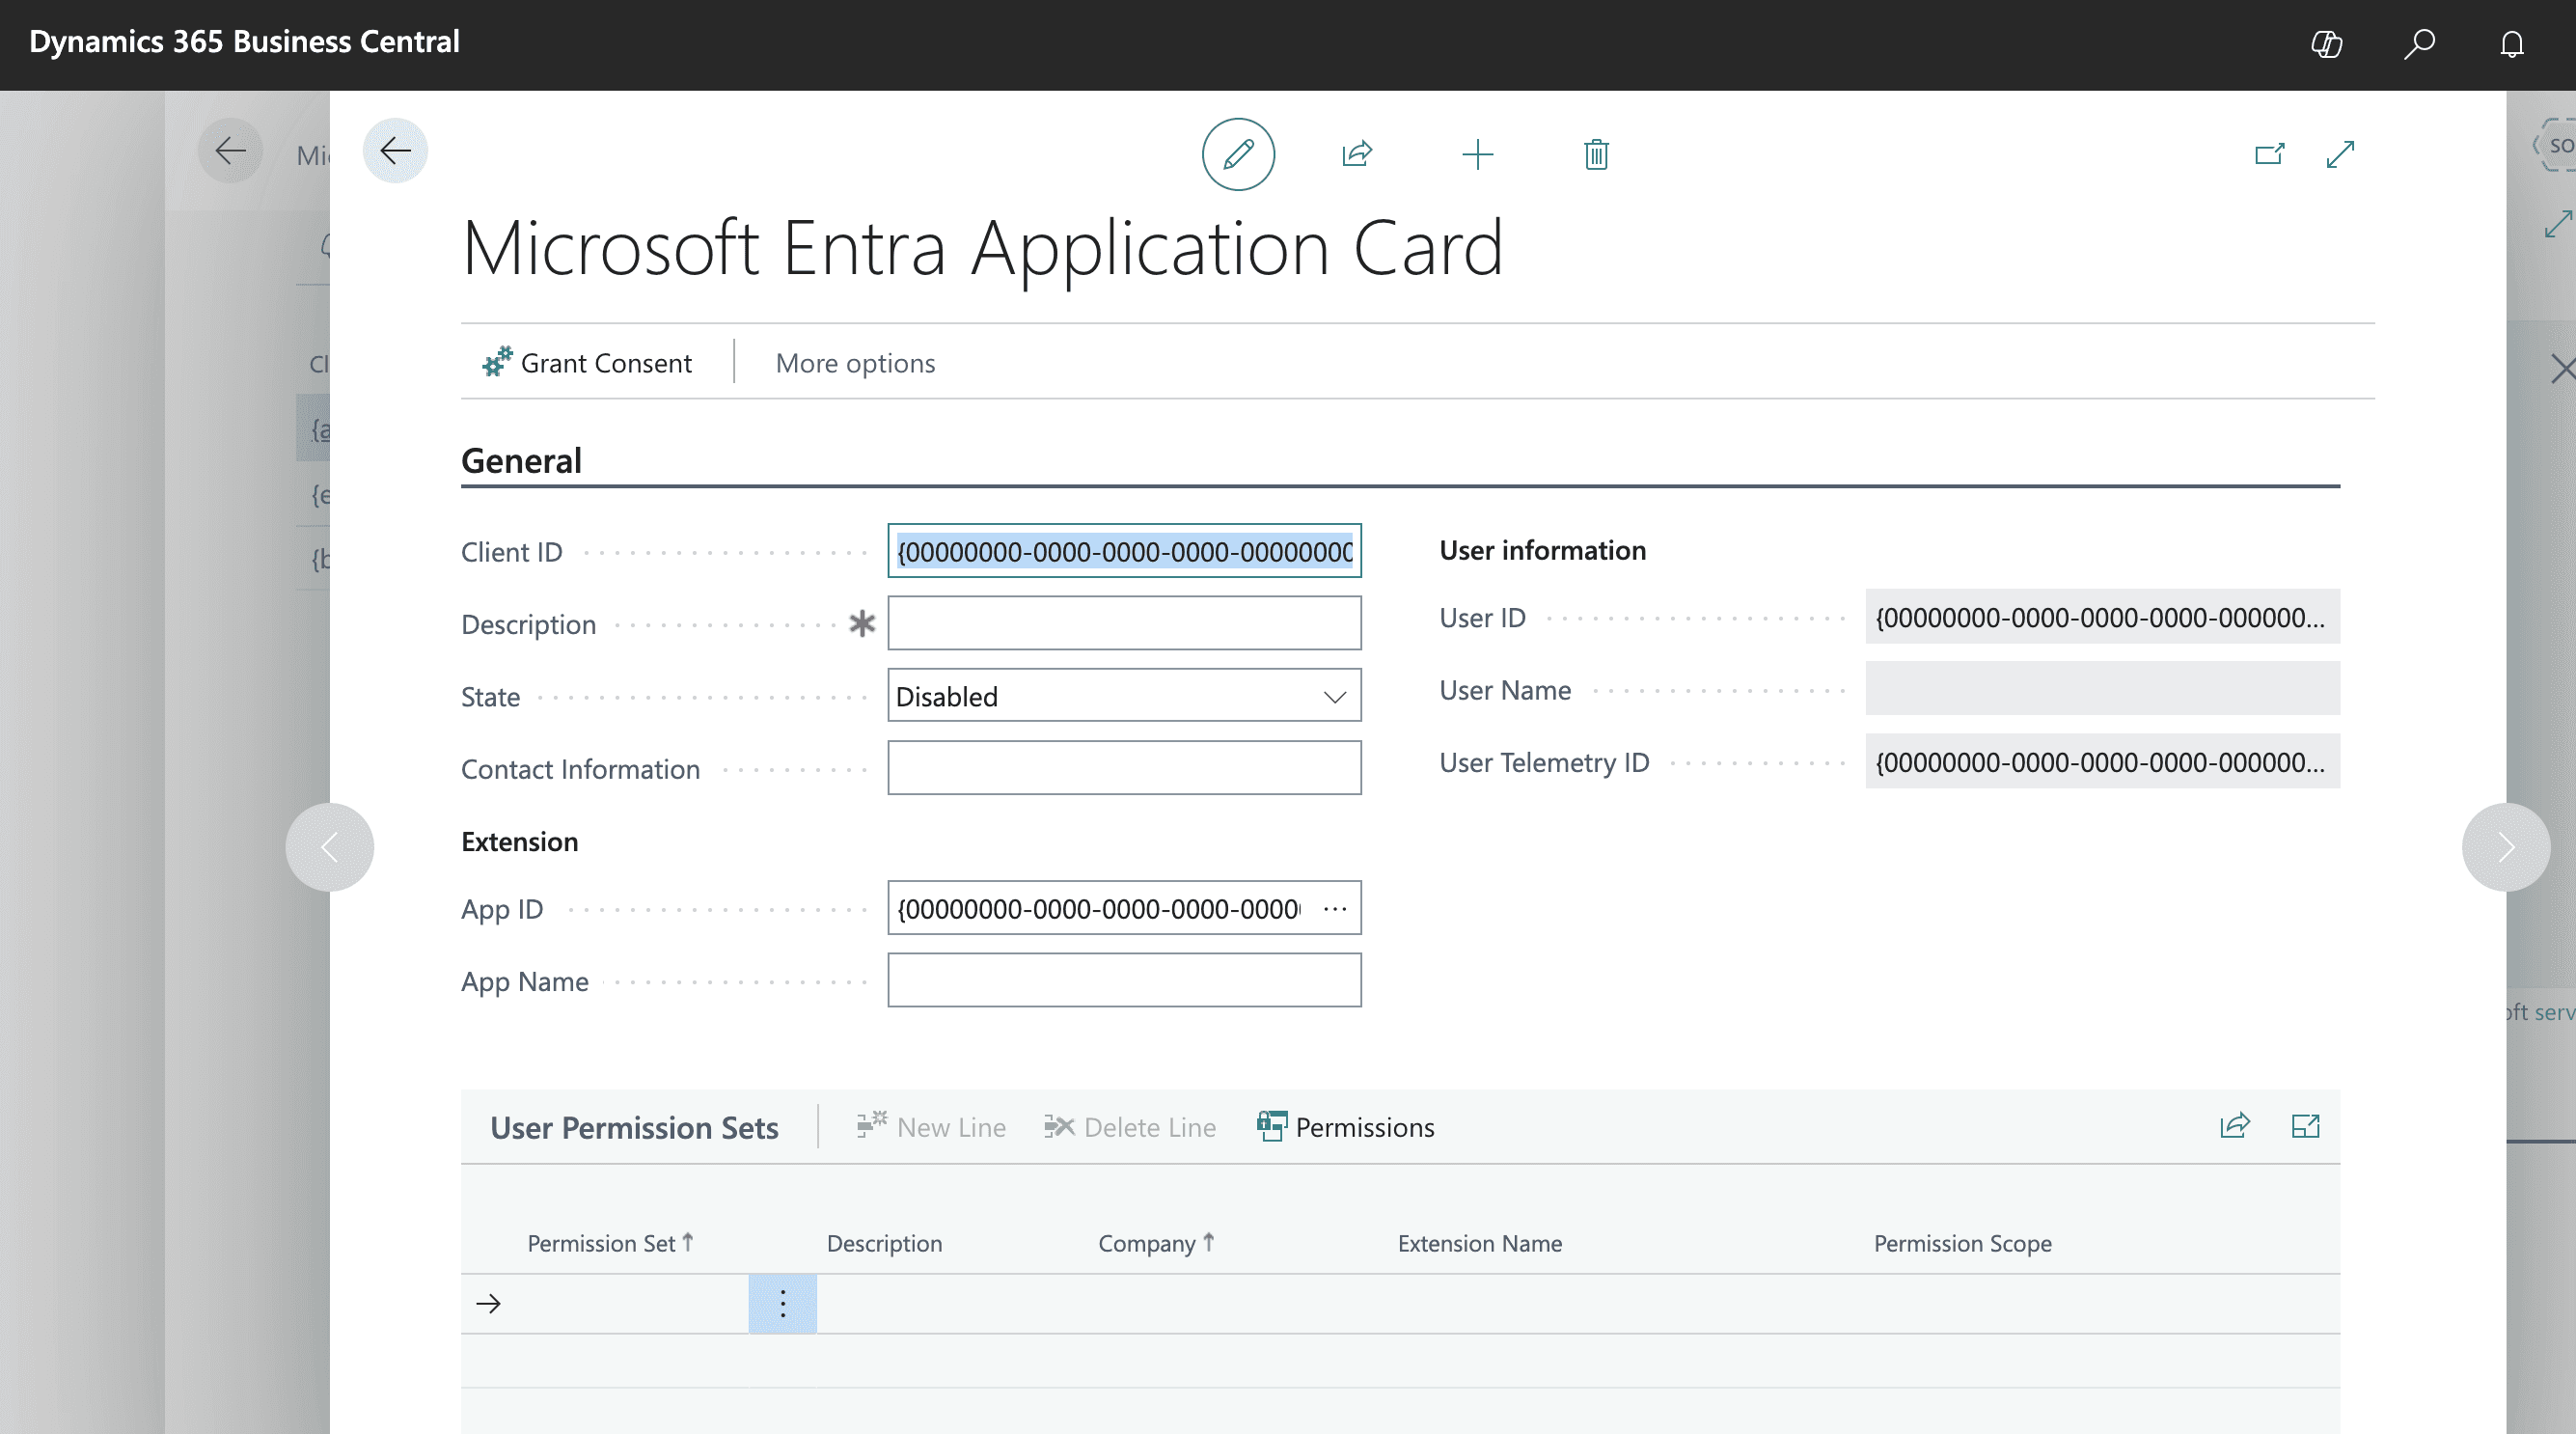
Välj Status: Aktiverad, och ge tillåtelse att skapa en användare.
Klicka på Lägg till behörighetsuppsättning, hitta D365 BUS FULL ACCESS, och tilldela den till det företag du håller på att onboarda.
Klicka på Ge samtycke, logga in och godkänn behörigheterna i guiden.
Skicka information till Equity
När ovanstående är inställt, skicka följande information till Equity via vår onboardingformulär:
Application (Client) ID
Client Secret
Entra Tenant ID
Business Central environment name
Link till onboardingformulär: https://onboarding.espintegrations.com/onboard/businesscentral_se